

Ever wanted to customize your invoice in Sage 50? In the past, we used the Crystal Report tool but have now created our own Sage Form Designer integrated with Sage 50.
You can customize forms such as: Reports, cheques, sales invoices, receipts, etc.
In the following steps, we will customize a sales invoice to add the company's phone number on the invoice.
Step 1 :
Verify that the company's contact information has been entered under Setup, Settings, Company and Information.

Step 2 :
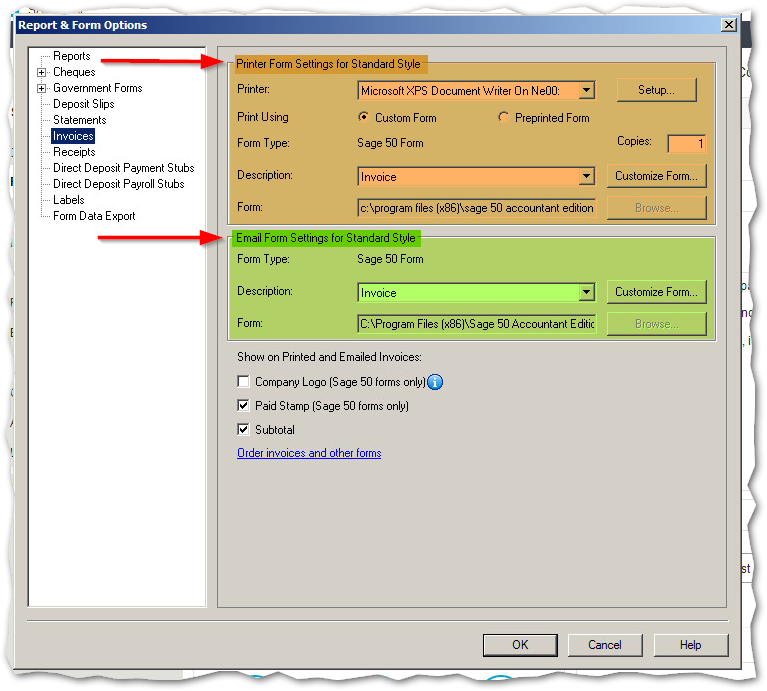
Click on Setup, Reports and Forms, then from the top left side select the Invoices option.
Afterwards, click on Customize Form in the printer section
Step 3:
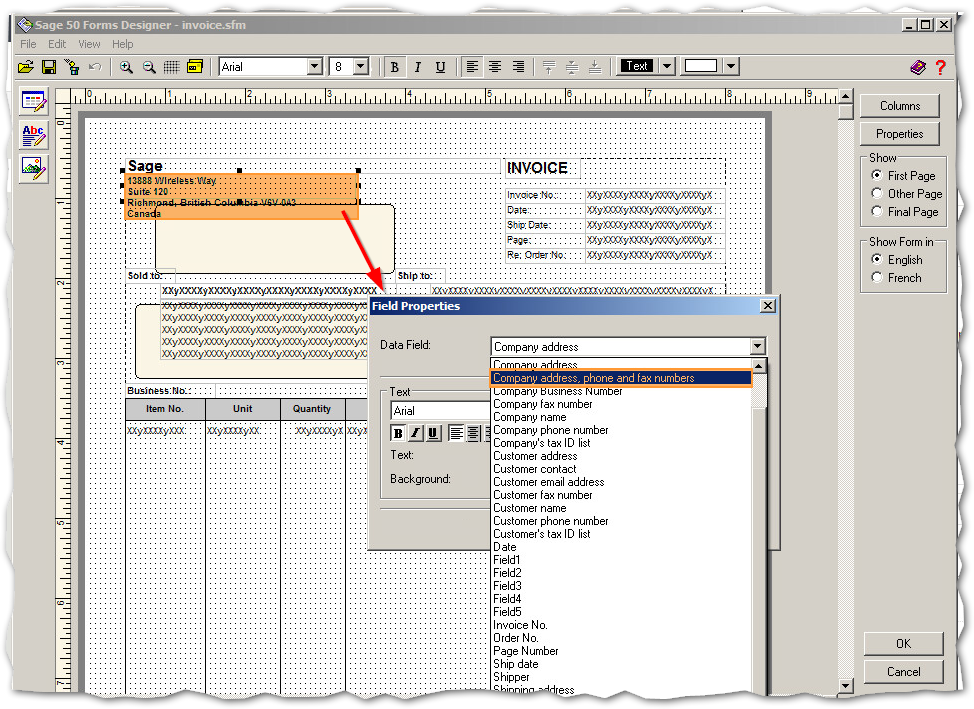
The invoice template will show allowing you to double click on the address (shown in orange). This will launch a window labelled Field Properties. You will then need to select the second option Company Address, Phone Numbers and Fax then click OK to the Field Properties window.
Note: Only the information entered in the settings (Step 1) will appears on your final invoice. If you do not enter the fax number, no fax number will be displayed.
Step 4 :
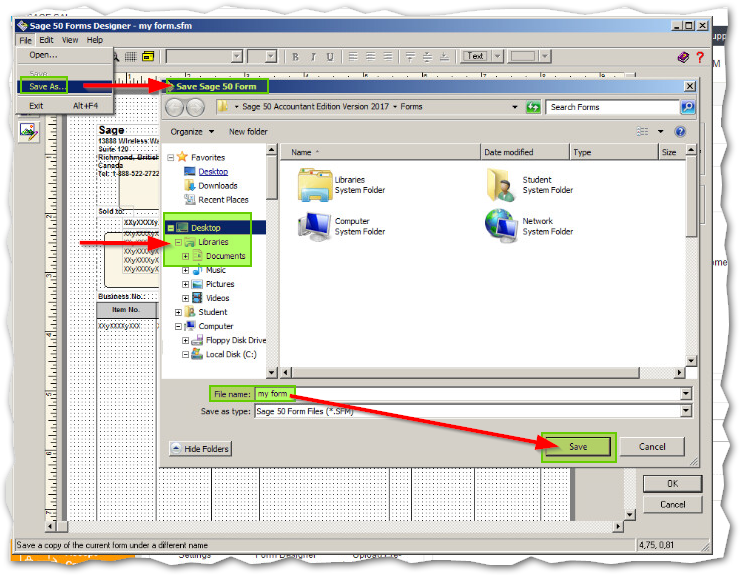
Save your customized form by clicking on File and Save as.
Choose a local spot on your computer (like your documents folder) then change the file name and click Save.
If you want to use this customized form to email it to your customers as well then follow the next steps.
If not then you can click OK to backup et voila.
Step 5 :
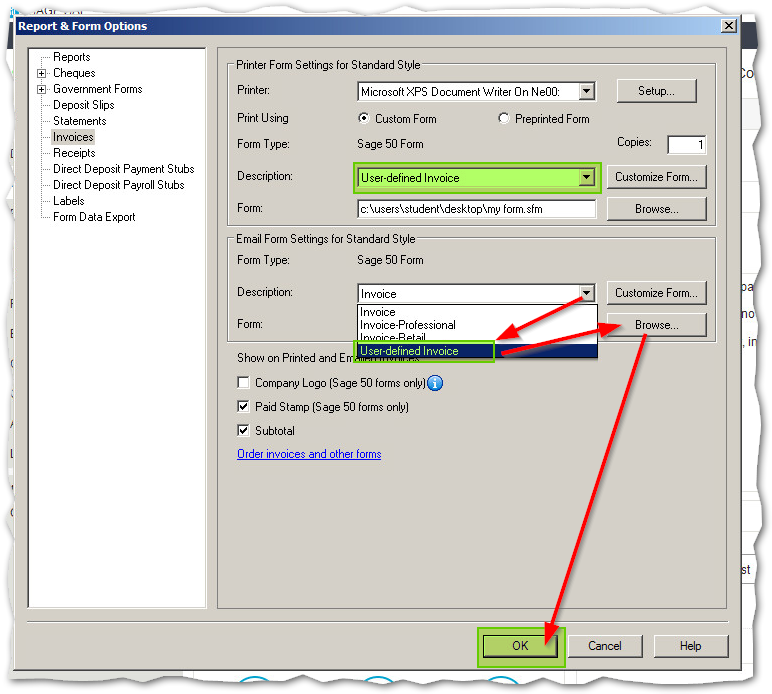
Return to the Report & Form option window and notice that the Description for the Printer Form Settings section now reads to "User-Defined Invoice".
The Email Form Settings section needs to match so:
- Change the description from Invoice to User-defines invoice.
- Click Browse to locate the form that you saved previously to match the printer part.
- Click OK to apply your changes et voilà !
Thanks for reading !
Stay tuned for more.
- By Charlotte Monsimier, edited by Erzsi Institorisz


